Published in: Rochester Woman Online • Photographer: Abby Sick • Face Model: Skylar Mahany Let’s start the year by answering the commonly asked question, “What do I do before I meet with my Makeup Artist for makeup application?” It is important to note that all MUAs have their own preferences for preparation, and you should always ask your artist what you should do if you are ever unsure. However, I am confident in stating I feel most will be able to agree with the tips I am sharing with you. Keep in mind ALL skin types, colors, etc. are different and everyone has different needs for both skin preparation and application. Based on this fact, I will be sharing BASIC preparation which can apply to everyone. For the sake of time, I will NOT be including recommended products for the various skin types. (Maybe that subject can be covered at a different time.) It is important to let your MUA know of any special treatments and accommodations you need and/or can’t have due to any religious beliefs, photoshoot requirements, allergies, personal preferences, etc. BEFORE application begins. While it should be a priority for your MUA to ask you, it is also your duty to protect yourself by notifying them prior to your appointment.
*Get out your handy dandy notebook, and take some NOTES! (;

You should have already discussed your meeting with you MUA prior to the preparation, but if you haven’t, here are a list of topics to discuss/understand:
- Where are you meeting for application?
- Does your MUA have a studio or are you meeting on-site (your home, wedding venue, photoshoot location, etc.)?
- What is the travel fee?
- What look are you wanting from your MUA?
- Having example pictures to show your MUA in advance is helpful.
- Understand your face/eye shape may not be the same as the photo you are sharing as inspiration for your look. Your MUA may have to make adjustments accordingly to provide the most flattering look for you.
- Having example pictures to show your MUA in advance is helpful.
- How much is the application going to cost?
- Are lashes extra, if so, how much?
- Do you also offer hairstyling, if so, how much?
- Is [insert whatever other thing comes to mind here] an option, if so, how much?
- Keep in mind tipping is always appreciated.
- Don’t be afraid to reach out with questions or comments before meeting… Also, try to show up to your appointment about 10-15 minutes early, if possible. (Better to be early than late.)
The most vital subject to cover when it comes to makeup application preparation is SKINCARE. An artist’s canvas needs to be as smooth, clean, and well-maintained as possible. Every professional MUA should be prepared for anything, but it certainly helps with the application process if you are as prepared as possible. As stated before, everyone has different needs, but everyone should prepare the same way before application. You should already have a daily and nightly skincare routine that is recommended for you and your skin type. If you do, that is wonderful! If you don’t, that is okay too! I’m here to help offer some advice about what you should do leading up to your appointment.
 If it is possible and within your budget, you should schedule a Facial with a professional within a week before your application. Some MUAs offer Facials, so it definitely doesn’t hurt to ask your MUA before seeking this service elsewhere. (It is a major plus if your MUA is a licensed Esthetician and is able to hook you up with said Facial because he/she will already be familiar with your skincare needs prior to makeup application. He/She can offer the best advice about how to care for your skin before and also after your application.) If you don’t have the option of getting a Facial, then here are a few helpful tips about caring for your skin (which should always be followed, but especially the week leading up to your appointment):
- Don’t stay up late at night.
- Bags under the eyes can only be helped so much by makeup.
- Make sure to get a GOOD night of rest the day directly before your appointment.
- Bags under the eyes can only be helped so much by makeup.
- Drink plenty of water.
- Staying hydrated helps keep your skin moisturized, and it also has MANY other great benefits for your overall health.
- Don’t go to sleep with makeup on your face/body.
- clogged pores = dirty skin = acne/blackheads = no good
- Don’t pop pimples.
- Instead, use a spot treatment. OR – Leave. Them. Alone.
- Makeup can be used to reduce redness, etc. Don’t stress if you are having a “situation”. We have ALL been there.
- Popping pimples punctures the skin and causes bleeding. Scabs and/or open wounds aren’t flattering for anyone… MUAs reserve the right to refuse application if they feel it is unsafe due to open wounds and/or possible infection. Scabs are much harder to hide than a pimple.
- Don’t wash your face in the shower.
- Wash your face AFTER your shower since your pores are naturally opened because of the steam. The hot water you use in the shower is much too hot for your face and can cause redness and irritation…or worse.
- Wash your face in the morning AND at night, making sure to follow up with any special serums and a moisturizer.
- This is where that note about how everyone’s skin is different comes into play MAJORLY… I can’t recommend any specifics for anyone because I don’t know your personal skincare needs. (Maybe I can cover this subject at a different time.) But I will say Murad, Dr. Brandt, and Dermalogica (in no specific order) are my top three recommended skincare brands for all skin types.
- Exfoliate a day or two BEFORE your appointment. (Make sure to moisturize as well.)
- Removing the dead/dry skin prior to application is helpful, but doing so IMMEDIATELY before your appointment causes an unnecessary amount of redness and can cause your skin to be more sensitive than usual.
- Sensitive skin is NEVER good when it comes to using makeup… While certain products suggest they are great for sensitive skin, this doesn’t mean irritation can’t occur. It is possible, so it is better to be more mindful and safer instead of sorry.
- Removing the dead/dry skin prior to application is helpful, but doing so IMMEDIATELY before your appointment causes an unnecessary amount of redness and can cause your skin to be more sensitive than usual.
- Exfoliate and moisturize your lips before application. You CAN do this the day of application, but do so gently.
- You can use a sugar scrub to exfoliate your lips and your favorite Chapstick to moisturize just before meeting with your MUA.
- IF you get a Spray Tan, make sure to do so PROFESSIONALLY (to avoid awkward streaks, colors, and lessen unnecessary problems)… At least a few days before your application.
Again, your MUA should be fully prepared for anything… BUT your preparation can be EXTREMELY helpful. Helping your MUA by taking good care of your skin can lessen the amount of time you spend in his/her chair, lessen the number of products used, lessen the number of steps required to achieve the desired look, etc. You get the picture, so I won’t elaborate any further about how important your skincare routine is…
 Now that skincare is covered, we can discuss the other important details like facial hair shaping and removal. You should do any waxing, plucking, threading, and/or shaving at least a few days before your appointment to allow time for possible redness to dissipate and to have time for any necessary adjustments (such as brow reshaping). Yes, the rumors are true…removing the baby hairs from your face can help shave off a few years and help you look younger. However, it isn’t necessary to do so. Your MUA should know the proper products and techniques recommended for every age, skin type, and color…and yes, that also means your MUA should know how to help you shave off a few years with makeup. IF you wish to remove hair before your appointment, you should seek a licensed professional who offers this service within the week prior to your appointment. The service you would be requesting is referred to as “Dermaplaning”. Dermaplaning is a technique where the outer layers of skin are exfoliated with the use of a blade – including hair. (Meaning you can skip the exfoliation step if you get this done because it should no longer be necessary.)
Skincare, check! Facial hair, check! Now, onto what to bring… Yes, that’s right, I said BRING! Even though you are seeing an MUA who should have everything you may want or ever need, you should still come prepared as best as you can to have your appointment go as smoothly as possible. You should bring:
- Your shade of foundation.
- While your MUA should have every shade available (or a means to mix and match), it is possible for some MUAs to struggle at matching your foundation. In which case, having your shade on hand greatly reduces the chances of your face being the completely wrong color.
- Helpful tip: You can visit your local Sephora and pick up some FREE samples. Most will allow you to pick ANY 3 samples. All you have to do is ask an associate for help. Unsure of what to pick up for yourself? Your shade of:
- Makeup Forever Ultra HD Invisible Cover Foundation
- Kat Von D Lock-It Foundation
- Giorgio Armani Luminous Silk Foundation
- Helpful tip: You can visit your local Sephora and pick up some FREE samples. Most will allow you to pick ANY 3 samples. All you have to do is ask an associate for help. Unsure of what to pick up for yourself? Your shade of:
- While your MUA should have every shade available (or a means to mix and match), it is possible for some MUAs to struggle at matching your foundation. In which case, having your shade on hand greatly reduces the chances of your face being the completely wrong color.
Again, PLEASE keep in mind all MUAs have different preferences, expectations, and requirements. Also keep in mind I am speaking mostly in generalities and from my own education and experience. My statements aren’t necessarily geared more toward any specific type of person or group of people, and I am in no way tearing down anyone or any group of people with anything I have stated. I will admit, most of the work I do is captured by professional photographers, so I treat every application as if my client is getting ready for a professional photo shoot. Every photographer I know is expected to get photos back to clients within a week (in most cases) or even a few days. The less touchups required for each photo…the faster the photos can be edited and sent to the clients. My duty is to make the photographer’s job as easy as possible by providing a flawless makeup application. And YOU can make my job easier by providing a well-maintained canvas. We are in this as a team… And it all starts with you. ❤
 There is MUCH more preparation for you, as a whole (obviously), but for the sake of time and space in the magazine…I just covered MUA preparation. Want other subjects covered? Let me know, and see if your request is fulfilled in future articles… Contact me on my website and connect via Social Media with any questions, comments, or concerns about this article: http://www.AudMakeupArtistry.com. I look forward to hearing from you!
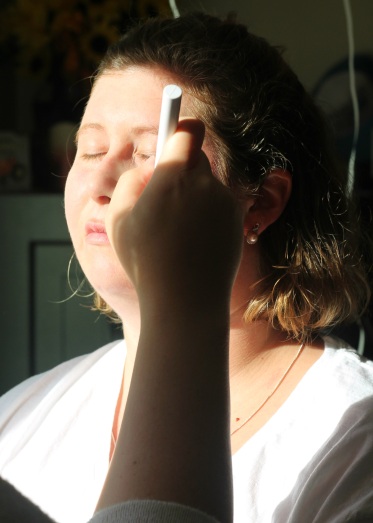
*Special thanks to Abby Sick for capturing me in-the-zone during my makeup application with the lovely Skylar Mahany. I genuinely appreciate you capturing me literally glowing from within doing what I love to do!